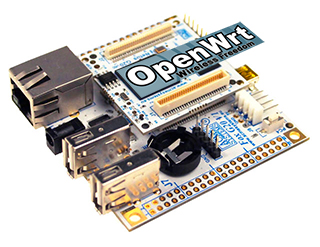
OpenWRT 15.05
About OpenWRT
"OpenWrt is a highly extensible GNU/Linux distribution for embedded devices (typically wireless routers). Unlike many other distributions for these routers, OpenWrt is built from the ground up to be a full-featured, easily modifiable operating system for your router. In practice, this means that you can have all the features you need with none of the bloat, powered by a Linux kernel that's more recent than most other distributions" Read more...
Requirements
- This procedure was tested on a Linux PC with Ubuntu 15.10
- It is advisable to have a Debug Port Interface or similar during the kernel bootstrap
Requested packages:
Install these packages on your Linux PC
~$ sudo apt-get update
~$ sudo apt-get -y install git openssl unzip
~$ sudo apt-get -y install binutils flex bison autoconf gettext texinfo
~$ sudo apt-get -y install sharutils subversion libncurses5-dev ncurses-term zlib1g-dev gawk
~$ sudo apt-get -y install build-essential
~$ sudo apt-get -y install libssl-dev
Step-by-step procedure
Clone the OpenWRT git repository:
~$ git clone git://git.openwrt.org/15.05/openwrt.git
~$ cd openwrt
Update the software packages (feed)
~/openwrt$ ./scripts/feeds update –a
~/openwrt$ ./scripts/feeds install -a
Save this file in the openwrt directory and rename it .config:
Select your configuration
~/openwrt$ make menuconfig
~/openwrt$ make defconfig
~/openwrt$ make prereq
Configure the Linux Kernel
~/openwrt$ make kernel_menuconfig
Launch the compilation
~/openwrt$ make V=s
Copy the kernel image and the device tree blob
~/openwrt$ cd bin/at91
~/openwrt/bin/at91$ cat openwrt-at91-legacy-zImage openwrt-at91-legacy-9g20ek-oftree.dtb > /media/$USER/boot/uImage
Copy the rootfs contents
~/openwrt/bin/at91$ sudo tar -xvzpSf openwrt-at91-legacy-AT91SAM9G20EK-rootfs.tar.gz -C /media/$USER/rootfs
Unmount the microSD, insert the debug port and try. Press a key on your serial terminal to get the access to the system prompt:
BusyBox v1.23.2 (2016-03-31 20:47:06 CEST) built-in shell (ash)

  _______                     ________        __
 |       |.-----.-----.-----.|  |  |  |.----.|  |_
 |   -   ||  _  |  -__|     ||  |  |  ||   _||   _|
 |_______||   __|_____|__|__||________||__|  |____|
          |__| W I R E L E S S   F R E E D O M
 -----------------------------------------------------
 CHAOS CALMER (Chaos Calmer, r49097)
 -----------------------------------------------------
  * 1 1/2 oz Gin            Shake with a glassful
  * 1/4 oz Triple Sec       of broken ice and pour
  * 3/4 oz Lime Juice  [   45.000000] random: nonblocking pool is initialized
     unstrained into a goblet.
  * 1 1/2 oz Orange Juice
  * 1 tsp. Grenadine Syrup
 -----------------------------------------------------
root@OpenWrt:/#
Procedura rapida partendo dai file compilati
Tempo richiesto: Circa 10 minuti
Per seguire questa pocedura occorre:
- Una microSD da almeno 1GB
- Una macchina Linux Ubuntu con Gparted installato
Formattare la microSD con due partizzioni fat32 e ext4 come descritto in questo articolo:
Creare una directory nella vostra home directory e copiarci detro i seguenti files:
- boot.tar.bz2 Contenuto della prima partizione
- rootfs.tar.bz2 Contenuto della seconda partizione
Montare la microSD quindi dare i i seguenti comandi all'interno della directory appena creata:
tar -xvjpSf boot.tar.bz2 -C /media/$USER/boot
sudo tar -xvjpSf rootfs.tar.bz2 -C /media/$USER/rootfs
Smontare la microSD e provare a fare il boot sulla FOX
Links
- OpenWrt web page
- OpenWrt doc
- OpenWrt build system – Installation
- Network configuration
- Installing LuCI on uHTTPd
Credits
Many thanks to Leo Guainella for his effort to find and provide this info